Monday, July 28, 2014

Feel free to shamelessly copy: Catholic tech handout

A few months ago, I gave a short talk before our parish's RCIA class about good resources for Catholics in social media, the web, and on smartphones and tablets.  It boiled down to a few different types of resources:

  • Who to follow on social media sites and what communities to join
  • What "read-only" resources to check out
  • Recommended Catholic-specific apps and recommended "secular" apps that that can help in practicing one's religion (reading eBooks, note taking, pod catching, etc.)
It was a lot of fun to do.  One of my favorite small touches of it (not sure if anybody used it, but if one person did it was worth it) was to compress everything into a one page document that could also be accessed via a web browser.  That way, folks took something home with them from the meeting and could go somewhere where they could click links in order to access the resources of which I spoke.  Much cleaner than trying to put all those URL's on the page, and much more precise than asking folks to just google anything they were interested in.  I could see doing this for just about any talk given where there are recommended online resources to check out (which is just about any topic I think!).

I didn't even really need to make a web page for this.  I just wrote a Google doc and then used the "Publish to the Web" feature in the File menu to make the web page.  From there on out, any update I made to the doc replicated to the public web page within a few minutes.

Feel free to use this or adapt it to your own parish or diocese. Here's the read-only web version and here's the Google doc.

Sunday, July 13, 2014

Rebuilding the laser scanner with iOS AV Foundation framework

At my day job, we have all of these splendid rugged PDA's with laser barcode scanners built-in. Fastest scanners in the West... great experience... until you look at the screen. Yeah, these things are running Windows Mobile. Sadly, though Android is finally becoming more popular, most of these devices still run some flavor of Windows CE. Scanner sleds are available for the iPhone and iPad, but they're expensive. I've never tried one and I'm not all that sure how well they integrate.

The processors on these modern devices are spectacular and there's camera optimizations and all that which make taking pictures literally a snap, so why not use that? There's plenty of scanner apps out there and some that integrate scanning into forms (I remember trying FormMobi and being pretty impressed with the results). Most apps take scanning to the full screen- like you hit the scan button, it goes to a full screen camera window, and then when you hit the barcode it takes you back to the data entry screen or wherever. I was curious as to how fast and how well things would work if the scanner's "laser" was in a peripheral view, like a separate window that represented looking over the screen of one of these ancient Windows Mobile rugged PDA's to see the red of the laser hitting the paper.

I'm quite indebted to Torrey Betts for providing a great code example of how to get started with using Apple's AV Foundation framework for reading barcodes. The framework is not quite as fancy as the Red Laser SDK, but I'm not quite ready to spend a few thousand on this. 
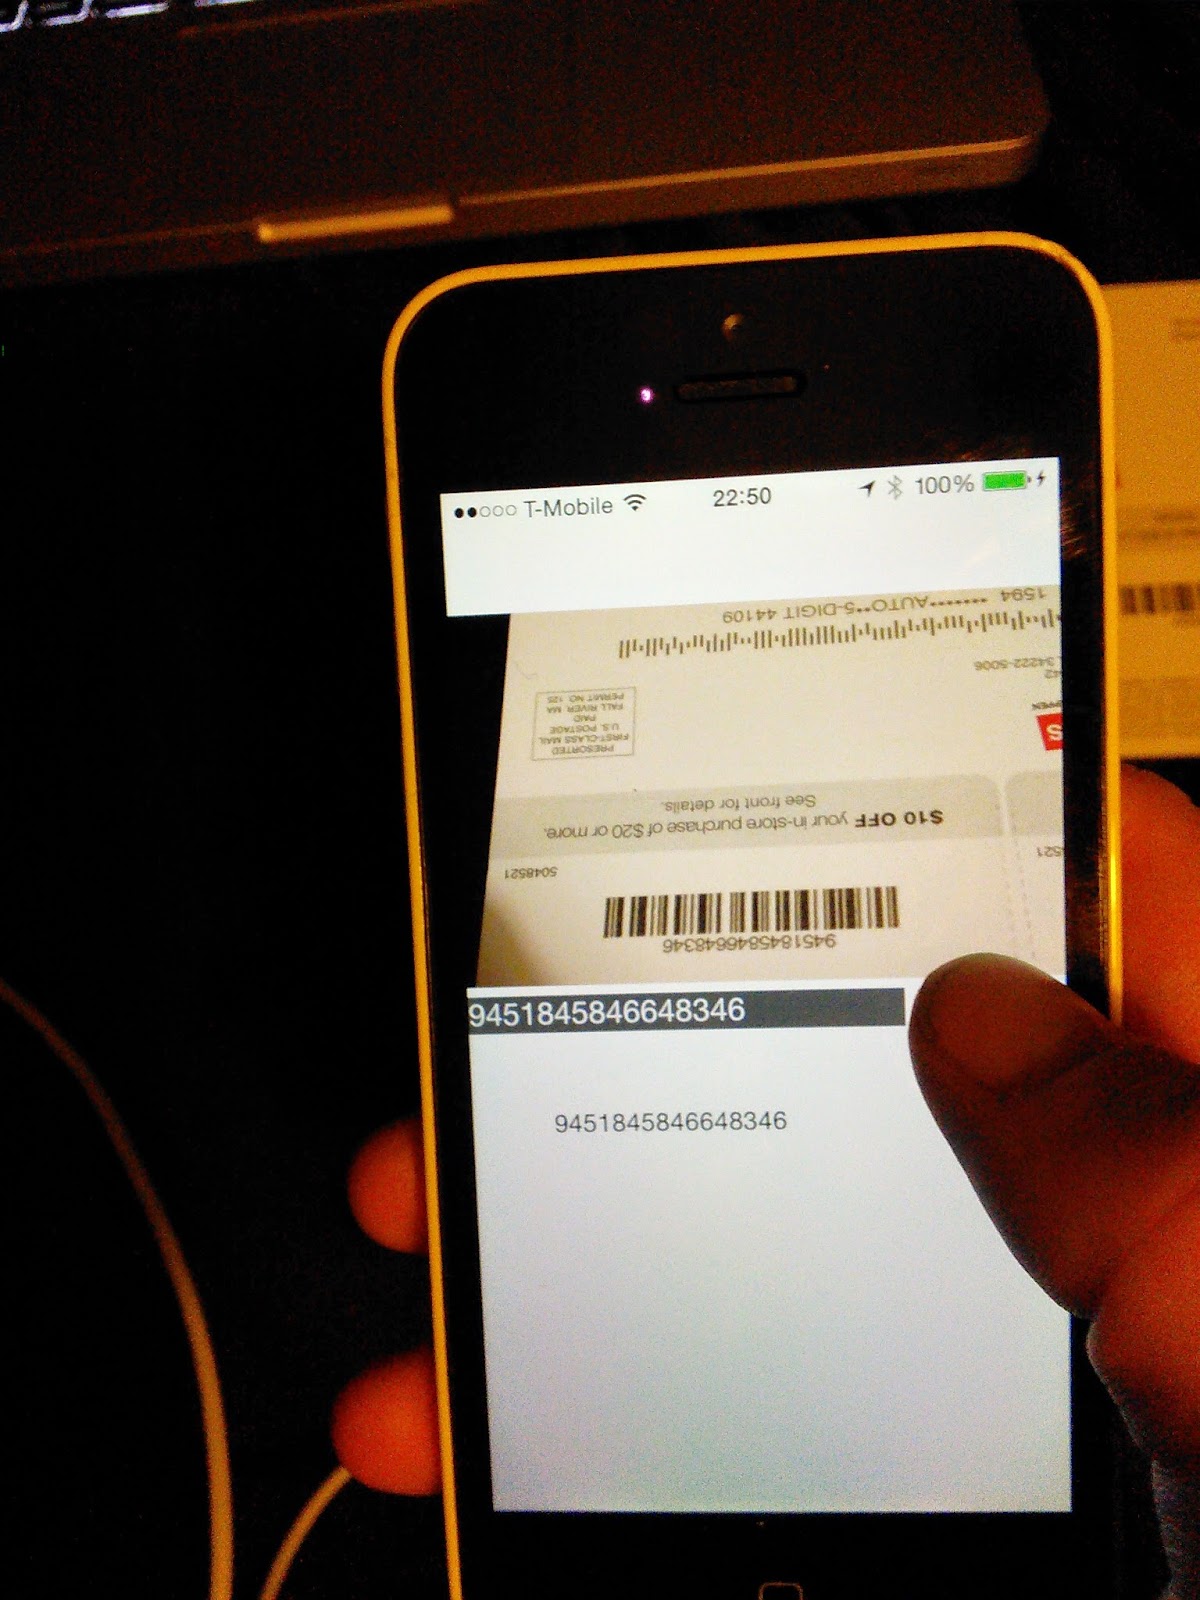
Anyway, I started with almost all of his code. I created my view on more storyboard with a child view within the top half. That would be the view for the camera output. Then a label to show what was last scanned, a text view for the scanning history (could be a table view or a whole entry form someday), and a button that would become the scanner trigger. I'm sure there's better ways to do this, but I got scanner trigger-like behavior by showing the camera view on the "touch down" event for the button, and removing the view upon "touch up inside" or "touch up outside". The result was that the user would push down the button and the scanning/ camera view would appear, and when they removed their finger from the button, the view would disappear. Additionally, whenever the view registers a valid barcode, the view disappears, requiring another press down of the Scan button. Thus, it's just like the trigger on my old rugged PDA.

 Here's all the special sauce I added:
     // if it found a barcode  
     if (detectionString != nil)  
     {  
       //update the label and history  
       self.lastScannedLabel.text = detectionString;  
       NSString *updatedHistory = [detectionString copy];  
       updatedHistory= [updatedHistory stringByAppendingString:@"\n"];  
       self.historyTextView.text = [updatedHistory stringByAppendingString:self.historyTextView.text];  
       //remove the barcode view  
       [_session stopRunning];  
       [self.prevLayer removeFromSuperlayer];  
       highlightViewRect = CGRectZero;  
       break;  
     }  
     else  
       self.lastScannedLabel.text = @"(none)";  
   }  
   _highlightView.frame = highlightViewRect;  
 }  
 //start scanning when the Scan button is pushed down (touch down)  
 - (IBAction)startScanning:(id)sender {  
   if(![self.session isRunning])  
   {  
     [self.barcodeScanAreaView.layer addSublayer:_prevLayer];  
     [_session startRunning];  
     [self.barcodeScanAreaView bringSubviewToFront:_highlightView]; //isn't necessary at this point because the line gets removed before anyone sees it. Could be useful if there was a delay before shutting down the view and recording the scan  
   }  
 }  
 //stop scanning when the button is pushed up (inside button) (touch up inside)  
 - (IBAction)stopScanning:(id)sender {  
   if([self.session isRunning])  
   {  
     [_session stopRunning]; //this makes the camera stop streaming to the screen.  
     [self.prevLayer removeFromSuperlayer]; //this makes the view containing the camera image go blank  
   }  
 }  
 //stop scanning when the button is pushed up (outside button) (touch up outside)  
 - (IBAction)stopScanning_Outside:(id)sender {  
   if([self.session isRunning])  
   {  
     [_session stopRunning];  
     [self.prevLayer removeFromSuperlayer];  
   }  
 }  
The whole thing is quite hastily-made, but I was quite encouraged that I could get that far in about an hour.  And the camera view appears and disappears quite quickly, even on my "old" iPhone 5C.  These rugged PDA's days are numbered...

Here's the git repo if you'd like to take a peek.

Tuesday, July 1, 2014

Throwback Tuesday: Screen scraping the hard way

The much-more-precise Beautiful Soup code I posted reminded me of when I used to screen scrape without really having any idea how. I'm sure HTML tree parsers existed back in 2003, but I had just learned regular expressions in my college courses, and of course I was determined to use them. My friend had just started an online book selling business, so I wrote him some apps to screen scrape from Amazon to pull bulk pricing information.
 my $connection = Win32::Internet->new();  
 my $amazon = $connection->FetchURL($amazonBook{"url"} . $amazonBook{"isbn"} . "/");  
 //...  
 if($amazon =~/<title>\s*Amazon\.com: (.*): Books.*<\/title>/)  
      {  
           $amazonBook{"title"} = $1;        
      }  
      elsif($amazon =~/<title>\s*Amazon\.ca: Books: (.*).*<\/title>/)  
      {  
           $amazonBook{"title"} = $1;        
      }  
      elsif($amazon =~/<title>\s*Amazon\.ca: (.*): Books.*<\/title>/)  
      {  
           $amazonBook{"title"} = $1;        
      }  
      elsif($amazon =~/<title>\s*Amazon\.com: (.*): Books.*<\/title>/)  
      {  
           $amazonBook{"title"} = $1;        
      }  
      else  
      {  
           $amazonBook{"status"} = "PARSE ERROR: title";  
           $amazonBook{"error"} = "PARSE ERROR: title";  
      }  
 //...  
 if($amazon=~/<span class="price">(.*)<\/span>/)  
      {  
           $amazonBook{"price"} = $1;        
      }  
      elsif($amazon=~/<span class=price><b>CDN\$ (.*)<\/b><\/span>/)  
      {  
           $amazonBook{"price"} = $1;        
      }  
      #if($amazonBook{"price"} =~/<font color=\#990000>CDN\$ (.*)<\/font>/)  
      #{  
      #     $amazonBook{"price"} = $1;  
      #}  
      #elsif($amazonBook{"price"} =~ /\$(.*)/)  
      #{  
      #     $amazonBook{"price"} = $1;  
      #}  

So clumsy in comparison! Every time Amazon made the price bold or not bold, it'd break the whole program, so by the end of it all I had 4-5 different regular expressions for each piece of data that needed to be scraped, depending upon the whims of Amazon. I love in particular the one that looks for a particular font color in order to find the price. I'm positive regular expressions can be done much better than I did, but, still, using classes to drill down to a small subset of HTML and then drilling down by elements seems like a much better way to go.